The problems of combining my images from shoots 3+4
- Lily Newman
- Dec 21, 2018
- 4 min read
Editing shoot 3:
Before I started to edit my images from my shoot from the green screen I didn't realise the green had bled onto the subject as much as it had, because of this I didn't realise I would struggle as much as I have done to edit the green out.
To start with I went through the exact same steps as before when I did the green screen introduction because my images looked like they had come out the same exposure wise. I edited the RAW files in Camera Raw and then dropped them into Photoshop.
I then:
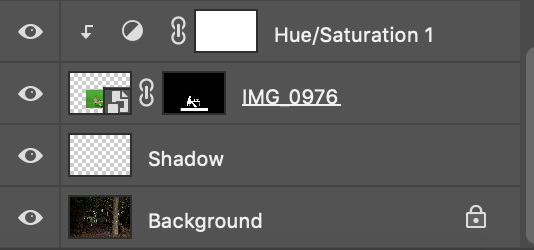
Created a mask on top of the image that I was editing.
Clicked on Select -> Colour Range and then selected the green with the eyedropper and adjusted the fuziness to where I needed it to be in order to delete the green -> invert. This then left a green bleed around the model but I still had some final editing touches to get on with. When I had finished this step it looked like all of the green had gone but when I placed it on the background there was still a lot of green on the subject. I then edited the hue and saturation and the brightness and contrast but that didn't help either. Below is the result from this edit:

I was determined not to give up so I tried editing again. This time I did the same steps as before but then didn't change the hue and saturation and the brightness and contrast. Instead I changed the colour balance twice which took the background away to start off with and then took the green away from subject. When the edit was completed I thought I had finally found a way of editing that would get rid of everything I needed but as soon as I put it on the background it looked nearly the same as the image above but when I dragged it onto the background a white background appeared so I had to go around and erase every single bit of white which was too time consuming as I had to keep zooming in to cut around the hands and fingers, when I got to the hair was the hardest part.

After doing all of the steps above I still didn't have an image that I was happy with so I decided to try something else to see if it worked. I again started with the same base steps and then made the editing a little more complicated by changing the colour balance 4 times and then adjusting the hue and saturation and the brightness and contrast once each. The picture came out a lot different compared to my very first edit but it still had a lot of green on the image so I still wasn't happy to print the image.
I then remembered that I was forgetting a step that I had learnt when we all did the green screen as a class. I was forgetting the feather around the edge of the image of the subject which wouldn't give as harsh line around the cut out of the person so I gave that a go and it didn't make that much difference but did in a way look like it was smoothing the green and the white together but it was the best image I had so far.

With the above image being the best image I had decided to ask for help because I was aware I was using up a lot of time trying to get the green out. I decided that if I couldn't do it with the help of a tutor and YouTube then I would re shoot and try that way. I followed a YouTube tutorial to help me remove the green. It was quite a complicated tutorial but I did manage to get the green off as much as I could and match the subject to the background. I still wasn't happy with how the final image came out so I have now decided to re shoot...
Editing shoot 4:
These images were actually fairly easy to edit because the lighting was good as it was natural lighting which I prefer to shoot in. The hardest thing about the shoot when it came to editing was the objects that had been hanging from the moved in every single shot so I only had a small few that I could actually use. I used flash in some of the images and one of the flash images are what I have decided to use for the background.
Editing these images were a lot easier than the images in the green screen but now I'm unsure whether I'm going to use the background images at all because of my trouble editing the other images.
The images combined:
Below is the final edited image of the green screen image merged onto the background of my choice but it took me too long to just do this one image so I'm going to re shoot on location this time.


Comments